

Razor Restoration Tutorial: Using CA Finish
Here is what you need to accomplish a very nice CA finish on scales:
- Wood Scales (Obviously)
- Thin CA Glue – I highly recommend 'Hot Stuff' found at Woodcraft (You have to ask for it as it is behind the counter.)
- Double sided tape
- Somewhere to mount the scales so you don't have to hold them in your hands
- Powder-free latex gloves
- Respirator (CA has some nasty, toxic fumes)
- Micromesh Sandpaper (Highly recommended, but regular high-grit paper can work as well)
- Turtle Wax Premium Rubbing Compound
Step 1:
Cut your scales to shape and drill the holes. I like to drill the holes out even though you will have to redrill them after the CA process is done. This isn't a tutorial on how to get this far, but you get the idea. These scales are lined Thuya Burl. (This is just a test set)

Step 2:
Round the edges and sand up to around 800 grit. Now you can prep the wood by lightly applying some mineral spirits, this removes all the surface oils, etc. Let it dry for a few hours.

Step 3:
Now here is where you need to mount the scales on something. I have done this 2 ways. The old way I used to do it is glue a popsicle stick to the bottom of the scale so you can hole it without touching the scales while applying the glue. The way I do it now is with this:

I took a section of 2x4 and glued some pencils to it. (Ignore all the epoxy resin all over the place.)
Now place 2 pieces of double-sided tape on the pencils, and stick the scales to it like this:

Then stick the scales to it:

Step 4:
Cut a finger off of the rubber gloves and put it on your index finger. Now get ready because you have to do this fairly fast so you don't glue yourself….to yourself. Here is the CA I use:

This stuff is very thin, like water. Makes it easy to spread without clumping. Now apply a thin bead of CA along the length of the scale and quickly spread it all over the scale evenly.

Make sure to get it all over the sides as well. DO NOT KEEP SPREADING FOR LONGER THAN A FEW SECONDS AS THE CA STARTS TO DRY INSTANTLY. If you didn't stick to the scale, congrats, you can continue. Let this dry for an hour. It doesn't take that long to dry, but I know how impatient people are and you will try to put on another coat on too quickly. If you touch the CA when it isn't dry yet, it will turn white and you will need to start sanding it down again and start over. So do yourself a favor and wait an hour, just because you want this to come out right don't you? When you get more experienced with it you can judge better when it can take another coat.
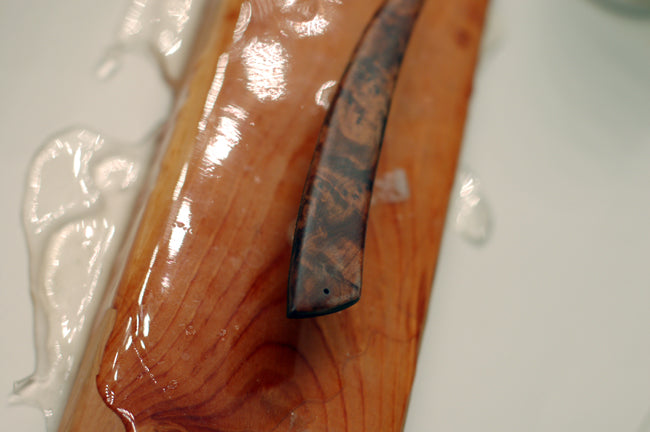
After 1 coat:

Step 5:
Do this 3 more times (4 coats total). Remember, very thin coats. No rush here.
Here is what the finish looks like after 4 coats:

Not very nice is it? Looks rough.
Here is where the sanding starts. I take Micromesh 1800 grit with water (if you don't have micromesh use 400-600 grit wet/dry sandpaper) and wet-sand until it is smooth and you can't see any shiny parts. The little shiny spots are low points and if you don't sand them out it will be lumpy.
It will look even and hazy when you are done. The trick here is to sand lightly, without much pressure. Too much pressure and you will sand through your coats of CA. Be especially careful on the edges. If you sand through a small part, don't worry about it. We will be repeating this a few more times.

I sanded too hard at the edge of the scale to show what happens:
You can see that I sanded through the CA in a few spots. That's ok we are doing more coats. If you barely sand through add 1 extra coat on the next step.
Step 6:
Apply 4 more coats of CA in the same manner as Step 4. Then sand like in Step 5 again. Now we are getting somewhere:

Step 7:
Repeat Step 6.
Step 8:
Now you have 12 coats of CA. This should be plenty now and you should be sanded smooth up to 1800 micromesh like this: (NOTE: the scales aren't wavy, the backdrop is, sorry.)

Now start to sand with the next higher grit micromesh (2400 grit) until you remove the previous scratch lines. Remember to do this without a whole lot of pressure and with water as to not sand through the finish. Keep going up a grit when you have completed the previous grit. With micromesh use 1800, 2400, 3200, 3600, 4000, 6000, 8000, and then 12000 grit. If you are using sandpaper use 400, 600, 800, 1000, 1200, 1500, and then 2000 grit.
3600 Grit:

6000 Grit:

12000 Grit:

You should have a pretty shiny nice surface now, but we aren't done yet.
Step 9:
Use an old cotton t-shirt (old undershirts work best) and put some Turtle Wax Premium Rubbing Compound on it and buff manually, you can do this as many times as you want to achieve the best finish. Here is the stuff to get:

After Buffing:

Now we are talking!!!
Step 10:
Re-drill the holes and admire your work.

I hope this helps people demistify the CA finish. It is not that difficult but it takes some practice to get it just right. I did these extremely fast (around 3 hours) and they are not how they would look if I were doing a restoration for someone, but you get the idea. Enjoy!!
Leave a comment